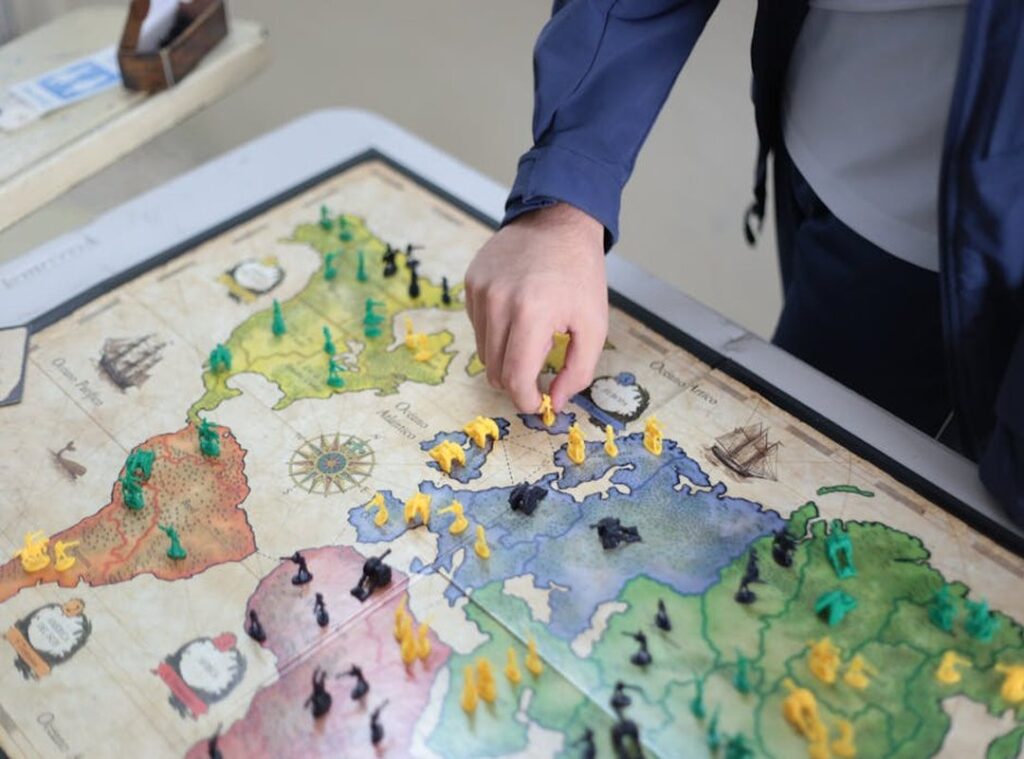
Isn’t it frustrating when you jump into a new game and you’re lost in the chaos? I get it. That’s why I’m here to talk about something every gamer craves: the ability to analyze war game maps like a pro.
You might think it’s all about luck, but there’s a method to the madness. You know what I’m talking about. The difference between victory and defeat often lies in understanding the battlefield.
Why trust me? Let me tell you, I’ve spent countless hours dissecting the details of war-themed games. I’ve delved deep into the mechanics and strategies, looking beyond the obvious.
And no, it’s not just about knowing where the enemy spawns. It’s about reading the space, predicting moves, and, yes, outsmarting your opponents.
Stick with me here, and you’ll walk away with takeaways that could change your game. Ready to raise your gameplay to the next level? Let’s dive in.
Maps: Your Secret Weapon
You might think a map is just a backdrop, but it’s much more. The map is an active participant in your battle, dictating every move. Do you just glance at that minimap?
That’s what I call passive map awareness. But when you analyze war game maps, you dive into active map evaluation. Why is that important?
Imagine a great general. They don’t just know where their soldiers are. They know the terrain they’re fighting on.
This insight is what separates the pros from the amateurs.
Understanding the “why” behind your map’s layout is key. It leads to better predictions and stronger defensive setups. When you nail this, your attacks become more effective.
Directly impacting your win rate? You bet.
And you want to know a secret? Mastering map evaluation is like unlocking a new level in your game. It gives you that edge everyone’s chasing.
Curious about more strategies? Check out Pro Tips Mastering Multiplayer Combat.
Remember, it’s not just about knowing the map (it’s) about owning it. The map is your most important unit. Why?
Because understanding it changes everything. The next time you load up, take a minute. Look at the map.
Really look at it.
The TERC System: Map Plan Made Simple
Ever felt overwhelmed trying to analyze war game maps? I know I have. That’s why I came up with the “TERC” system (a) simple checklist to dominate any map.
It’s not rocket science, but it’s effective.
T for Terrain & Topography. This is about the lay of the land. Mountains, valleys, open fields. They all shape your plan. If you control the high ground, you’re in a solid position. I’m sure you’ve heard the phrase “owning the high ground” before. It’s true in both real wars and virtual ones.
Then there’s E for Economy & Resources. Where do you gather your supplies? Certain areas are rich in resources, and holding these can tip the balance in your favor. Imagine a map where the economy is centered around a single resource-rich area.
Now, picture yourself controlling it while your opponent scrambles.
Next, R for Routes & Rotations. Think of this as the flow of the game. Where can you move quickly? Which paths are safest?
This is where many players falter. They underestimate how key routes are until they’re caught in a bad spot.
Finally, C for Choke Points & Control Zones. These are the areas you must hold. Choke points are narrow passages where you can bottle up the enemy. Control zones offer strategic advantages.
Ever tried pushing through a well-defended choke point? It’s like trying to squeeze toothpaste back into the tube.
Now, let’s see TERC in action. Picture a map with a central mountain (your Terrain). The mineral-rich area is just past a narrow pass (your Choke Point).
By controlling this pass, you gain access to those resources (your Economy) using the main path (your Route).
The beauty of TERC is its flexibility. It’s not a rigid rulebook. It’s a mental checklist.
Run through it at the start of each match, and watch your plan come together. Simple, effective, and solid.
T is for Terrain: Mastering the Battlefield
When you analyze war game maps, the terrain isn’t just background art; it’s your best ally. Picture this: you’re an archer perched on high ground. Suddenly, you’ve got a range bonus, and your arrows rain down like a constant storm.
High ground offers a vantage point, making it key for both offense and defense. It’s like being at a concert in the front row, seeing everything unfold.
Now, let’s talk about cover. Forests, ruins, even smoke. These aren’t just pretty scenery.
They’re strategic assets. They shield your units, create perfect ambush spots, and negate enemy ranged attacks. Imagine sneaking through the shadows of a ruined castle, setting up a surprise attack.
It’s the stuff of legends, right? Cover isn’t just protection. It’s an advantage.
Then there are impassable terrains like mountains or deep water. These aren’t obstacles; they’re natural barriers that funnel armies into predictable paths. Think of them as the velvet ropes at an exclusive club.
They control the flow, making the battlefield more manageable. Use them wisely, and you can predict enemy movements.
Pro tip: always scan the map for elevated positions near key objectives. Controlling them often means controlling the fight. It’s like having the high ground in a negotiation (you’re) in charge.
Want to know more about these tactics? Check out this inside pro gamers daily practice routine. You’ll find takeaways into how the pros handle these elements every day.
Terrain mastery isn’t just about luck. It’s about plan, planning, and understanding your battlefield. That’s the real game-changer.
E & R: Securing Your Economy and Controlling the Routes
Ever tried to analyze war game maps? It’s like reading a story where you decide the ending. Your economy and routes are your lifelines.

Here’s the thing: identifying resource locations isn’t just about finding the nearest gold mine. It’s about knowing which ones are primary, secondary, and tertiary. Think of it like grocery shopping.
You need essentials first, snacks second. And those obscure items you only buy on a whim? They’re tertiary.
Visualizing these routes is key. Imagine the map as a city grid. Your main attack path is like the highway.
It’s loud, straightforward, and everyone knows it. Flanking routes are the scenic back roads, secret and sneaky. Retreat paths?
They’re your emergency exits, the fire escapes you hope you never need but are so glad to have.
Now, let’s talk expansions. Safe ones are like the cozy cafes near home. You know the barista, it’s easy to get to.
The connection? Control the routes, protect your economy. It’s a dance.
The risky ones are the dodgy diners across town. Sure, they might be thrilling but could ruin your night (or plan).
You secure your path to that cafe, then figure out how to block your opponent’s commute. First priority: secure your nearest expansion path. Second priority: make their route a hassle.
You’ll cut off their resources while bolstering your own. It’s not just about where you are but where you can go. Every path is a possibility.
So, which road will you take?
C is for Choke Points: Gates of Victory and Defeat
Choke points are the ultimate game-changer. A choke point is a narrow area where a smaller force can hold a larger one. It’s the best place for defense but also a nightmare to attack.
Picture this: a key point on the map where the battle’s outcome hangs in the balance. Analyze war game maps and you’ll find these hotspots. They’re perfect for setting up with siege units or area-of-effect abilities, turning the tide of battle with minimal resources.
But attacking? It’s like charging headfirst into a blender. You could try flanking maneuvers or cranking up the pressure with overwhelming force.
But never (and) I mean never (blindly) march your whole army through without knowing what’s ahead. (Are you asking for ambushes?) The chaos of combat becomes your worst enemy.
Pro tip: Always make sure vision before committing to a choke point. That’s the difference between victory and utter chaos.
Make the Map Your Secret Weapon
Think about all those times you were out-positioned. Painful, right? Now, it’s different.
You’ve got the tools to fix it. The map isn’t just a background; it’s your plan’s backbone. Ignore it, and you might as well wave the white flag.
The TERC system is your friend here. It gives you a clear, repeatable process to dominate any battlefield.
So, what’s next? Load up your favorite plan game. Pick a map and analyze war game maps like never before.
Run through the TERC checklist. Your next victory is just a click away. Go claim it.
 Markenzo Daileyaps writes the kind of battle strategy insights content that people actually send to each other. Not because it's flashy or controversial, but because it's the sort of thing where you read it and immediately think of three people who need to see it. Markenzo has a talent for identifying the questions that a lot of people have but haven't quite figured out how to articulate yet — and then answering them properly.
They covers a lot of ground: Battle Strategy Insights, Dark-Fantasy Combat Systems, Hot Gaming Topics, and plenty of adjacent territory that doesn't always get treated with the same seriousness. The consistency across all of it is a certain kind of respect for the reader. Markenzo doesn't assume people are stupid, and they doesn't assume they know everything either. They writes for someone who is genuinely trying to figure something out — because that's usually who's actually reading. That assumption shapes everything from how they structures an explanation to how much background they includes before getting to the point.
Beyond the practical stuff, there's something in Markenzo's writing that reflects a real investment in the subject — not performed enthusiasm, but the kind of sustained interest that produces insight over time. They has been paying attention to battle strategy insights long enough that they notices things a more casual observer would miss. That depth shows up in the work in ways that are hard to fake.
Markenzo Daileyaps writes the kind of battle strategy insights content that people actually send to each other. Not because it's flashy or controversial, but because it's the sort of thing where you read it and immediately think of three people who need to see it. Markenzo has a talent for identifying the questions that a lot of people have but haven't quite figured out how to articulate yet — and then answering them properly.
They covers a lot of ground: Battle Strategy Insights, Dark-Fantasy Combat Systems, Hot Gaming Topics, and plenty of adjacent territory that doesn't always get treated with the same seriousness. The consistency across all of it is a certain kind of respect for the reader. Markenzo doesn't assume people are stupid, and they doesn't assume they know everything either. They writes for someone who is genuinely trying to figure something out — because that's usually who's actually reading. That assumption shapes everything from how they structures an explanation to how much background they includes before getting to the point.
Beyond the practical stuff, there's something in Markenzo's writing that reflects a real investment in the subject — not performed enthusiasm, but the kind of sustained interest that produces insight over time. They has been paying attention to battle strategy insights long enough that they notices things a more casual observer would miss. That depth shows up in the work in ways that are hard to fake.